Saturday 7 December 2013

Heidi Swapp Make Pretty Stuff Downunder Tour - After Class Challenge

In the exciting whirlwind that was the Heidi Swapp Make Pretty Stuff Downunder Tour, I was lucky enough to be one of the group of ladies at the gorgeous Petrie School of Arts for the Brisbane leg of the tour on the 9th November.

It was a truly inspiring day, and such a treat to be taught classes by two so very talented ladies in Heidi Swapp and Kim Jeffress.

This is me with Heidi on the day.


Today I'm sharing my entry in Heidi's after class challenge.  A couple of days ago I realised just how close to Christmas we are, and how much I still need to do before the big day!   Being a list maker I went straight to one of my spare notebooks from Typo and made sections for our upcoming holiday, presents to buy, jobs that need doing before Christmas, and food that I need to plan for our guests' extended stay.  I really wanted to make it feel Christmassy though...  

If you've had an A5 spiral notebook from Typo you'll know that underneath the protective plastic cover the first page is a cardboard page with a pocket to slip little bits and pieces in.  My notebook had a black cardboard page, which worked really well with the chalkboard art theme in the Heidi Swapp 'Believe' collection.

I folded the plastic cover page to the back (because we are travelling away on our family holiday shortly, and I can fold it back over to protect my sequins and embellishments on the cover while it's in our suitcase), but if you prefer, you could trim the plastic cover off with scissors. 


I used my We R Memory Keepers file tab punch using different patterned papers from the collection to create tabs, and added labels from an old fashioned Dymo labeller.   The challenge was to use at least 5 items from the kits we were given on the day.  I used bits and pieces of patterned paper, one of the 3x4" filler cards and three items from the ephemera pack.

I love that my list-making can be so festive!  


Heidi was very generous with her gifts on the day, and we were all given the 12x12" "Believe" collection paper pad.  These are a couple of cards I made with some of this gorgeous product.


The Joy to the World bauble / tag was actually from a sheet of patterned paper.  You can see a glimpse of it here on Heidi's website.  I used a 2" circle punch to make my own Joy to the World embellishments.

How are you going with your Christmas countdown?  Maybe a festive little notebook will help get you in the spirit!


Sunday 1 December 2013

Project Life - Week 42

It's Sunday night already!  Hope you've all had a lovely weekend putting up Christmas trees and decorations!

My last post I shared with you first project life page.  After a break for a couple of months around the middle of the year I have been documenting each week since the start of August.  Already I love leafing back through each week, seeing everyday photos, screenshots of texts the kids and I have sent  to each other, and even some of the funny things that they say.  

It would take me a bunch of posts to share each weekly spread I've already done, so I'll jump forward a few months to week 42.  I'm still getting used to referring to each week as a number, and not the actual date.  I think for the remainder of 2013 at least I'll document by the date and start the 2014 with week numbers.  I'm already thinking of ways to improve what I'm already doing in PL in the new year, and I'll share some more of those thoughts closer to the end of this year (which really isn't that far away!).

The left side.


I'm using the Dear Lizzy Polka Dot Party collection at the moment.  Loving the mix of feminine florals and pastels with some bold colours and graphic designs thrown in for good measure.

The right side.


This week is mostly about our mini vacation to the Gold Coast.


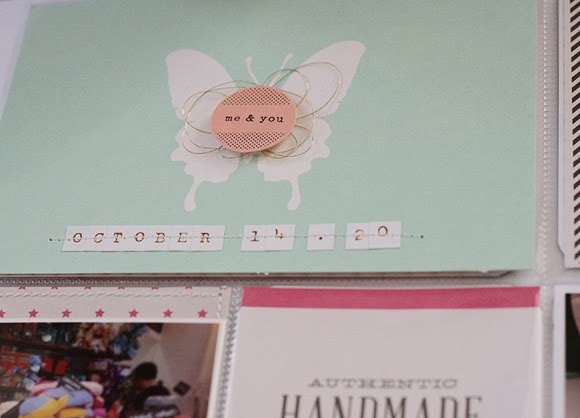
For the date card I used one of the 6x4 cards on the Warm Welcome paper.  Can you tell I'm having a 'slight' obsession with anything gold at the moment?!!  I've also really gone back to using a lot of stitching lately.


I hope the chalkboard trend stays around for a while longer.  


As a compromise between my handwriting, which I find is the fastest method of journalling (but I'm not a super fan of my own handwriting), and printing journalling on the computer (which is great but can take a bit longer), I have been using my typewriter for most of my journalling recently.  Yes there's the occasional typo, but it doesn't worry me too much, and kind of adds to the rustic charm I think!

What's your choice of journalling for your own PL?  I often see scrapbookers comment that they don't like their own handwriting and think its a shame, but really I'm exactly the same!  I know I should use some handwritten journalling, and just between you and me, I'm actually practicing making my handwriting prettier!  We'll see how we go with that haha.


The Studio Calico wood veneer chevrons are another crush I have right now.  The Authentic Handmade journalling 3x4 was perfect to document our visit to the Gold Coast Lush store.  I'm just like a kid in a candy store visiting Lush!

Thanks so much for stopping by today.


Sunday 24 November 2013

Trying out Project Life

After having so much fun making this holiday album using pocket page scrapbooking, I thought I'd have a go at documenting our daily lives through Project Life.  

I wasn't sure how much of my crafting time I wanted to commit to this project, and reading other girls' blogs I noticed a trend that most people who document weekly spreads tend to fall behind at some time or other, and then get frustrated and disappointed that they can't keep up.  So I promised myself that there was no pressure & no rules.  If I miss documenting some time so be it.  

In keeping with the 'no pressure' promise I decided to start off with monthly recording.  Just one month at a time, and however many pages I ended up with was a-ok - no rules right?!  So here's my first ever real PL reveal.


I used the Dear Lizzy 5th & Frolic collection.  Some 12x12" papers and the 6x6" paper pad, some chipboard and die cuts and a few other bits and pieces.  Yes that is a real lace doily under the "little moments" die cut.  I had that in my stash thanks to a scrappy garage sale by the lovely Cathy Cafun.


I recorded our month in one double and one single page, and I'm really happy with that (no rules remember!).  


During this time we had Easter and Brent's 16th birthday.  I took a screenshot of and then printed a Facebook post Kayci left for her brother.  She had posted a photo of him from when he was playing U7 rugby with the sweetest birthday message for him.


I also recorded the erosion to our beaches we had been suffering over the summer cyclone season…and also the fact that our Cavaliers Rosie and Daisy really didn't mind - the exposed coffee rock makes for the perfect beach lookout!

And that's the month recorded.  So, after my first PL what did I think?  Adored it.  In fact I probably like PL just as much as traditional scrapbooking.  So glad I tried it out!  Have you tried your hand at Project Life yet?  Do you try to keep up with weekly spreads or are you happy to miss some if life gets too busy?


Saturday 23 November 2013

5 Reasons to Document your Holidays using Pocket Page Scrapbooking

This year, like a growing number of scrapbookers, I have jumped on the Project Life / Pocket Page Scrapbooking bandwagon, and I have to tell you, I just LOVE it!

My first play with Pocket Pages was to record our family holiday to the Whitsundays.  This system is perfect to record your holidays, and if you're not ready to become a true 'Project Lifer' just yet, documenting a holiday is a great way to get a taste for how PP Scrapbooking works.

So here we go… 5 reasons to document your family holiday using Pocket Page Scrapbooking.


1.  You can get a bunch of photos scrapped!  Traditional scrapbooking is fantastic for recording those special photos, but when you're a single photo per layout kind of girl like I am, you can imagine how many layouts it would take me to record a holiday!  With Pocket Pages it can be as simple as printing your photos in the standard sizes (eg 6x4"), and slipping them in the pockets (along with some journalling cards of course).  You can see on the page below that I have fit 7 photos on a double page, one of them being a big 6x8" photo.


2.  You choose how you record each page.  For my holiday album I have chosen to use a double page for each day of our 10 day holiday, but how you record your own holiday is entirely your choice.  For example you might choose to do a double page on each destination you stay at; or on a special outing like a theme park; or if it's a holiday to see family that you don't often see, devote a page to a particular family member.
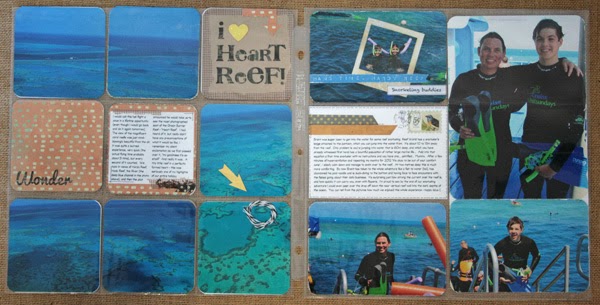


3.  Pocket Page Scrapbooking makes holiday journalling So Easy!  Lets face it, most traditional layouts may have some journalling, but not nearly as much detail as what you want to record when you're on holiday.  I find it easy to allocate one or two pockets per spread to devote to journalling.  In this 6x4" post-card-styled journalling pocket below, I had a fair amount I wanted to record, so in Word on my computer I created a 6x4" document.  I reduced the font size so I could fit more journalling in.  Once typed, I printed it on my printer using the 6x4 photo tray.  A small amount of embellishment and that's a good memory documented.

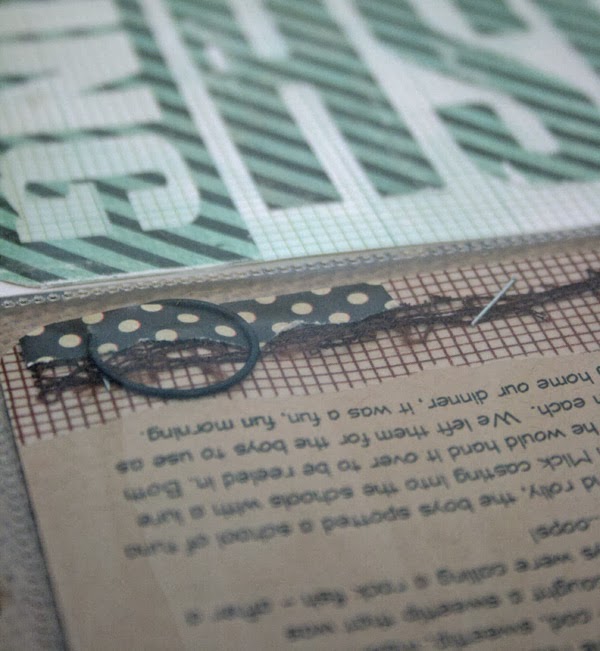
I got a close up shot of this journalling for you because it's a memory that I'm so glad I recorded while it was still fresh - every time I read it I'm taken back to that moment when I'm about to jump into the ocean, absolutely petrified!


4.  Those Holiday Landscapes & Panoramas  I don't know about you, but the time I'm most likely to take a bunch of photos of landscapes and panoramas is when I'm on a holiday.  That's one of the reasons to go on a holiday right... to see new and beautiful places?

Pocket pages come in an almost endless variety of pocket sizes these days.  (I used a multi-pack by W R Memory Keepers in this album.  You can see some of the many choices here.)  A lot of these pages lend themselves to panoramas. 


In this spread I have included a 6x12" in portrait orientation (on the left), a 3x12" in landscape orientation (on the right).  I have also printed a 6x8" in portrait orientation, and cut it into two 6x4"s to fit those pockets.


Another 12x3" panorama showed off our visit to Whitehaven Beach.


And yet another 12x3"enjoying the setting sun on Long Island.


And last but not least…

5.  Portability  I have left this point until last because I haven't utilised it in this album, but it's still a very important reason why PP Scrapbooking is perfect for documenting your holiday.

Part of PP Scrapbooking's charm is it's portability.  It really takes no room at all to pack a small zip lock bag with a journalling pen and a handful of 6x4" and 3x4" journalling cards, such as the ones in these kits put out by Becky Higgins.  What this means is that while you're still actually on holidays, record your daily memories direct onto the journalling cards and that's your journalling done!  All you need to do when you get home is print your photos and slip everything into the pockets.


A couple of close ups to finish off my holiday album.  In case you're wondering, for this album I used this Collection Pack - Serenade by Basic Grey - and created my own journalling cards using patterned paper and card stock.  

If you don't want to start from scratch with journalling and filler cards, most papercraft companies offer journalling papers these days, whether it's Becky Higgins' Project Life cards (link above) or 12x12" papers that can but cut down, like this one from Echo Park.


I hope you've enjoyed the tour of our Whitsunday's holiday album, and that you might consider using Pocket Page Scrapbooking to document your next family holiday.

If you have any questions or would like to try Pocket Page Scrapbooking but don't know where to start, leave me a comment or send me an email (link in sidebar) and I'll be happy to walk you though.


Monday 2 September 2013

Flowers, flowers and more flowers!

Hi there blog readers.  I'm here today with another layout that was published in Scrapbooking Memories recently, All the Pretty Things.  

This layout is a celebration of having a teenage daughter and some of the girly things you can do together, like wearing cute little dresses and killer heels!

I pulled out all stops with the pretty pink florals.  The Crate Paper floral border paper is just beautiful and so rich in colour.  I haven't used much patterned paper in this layout, but pieced little pieces of die cuts, tags, and ephemera in lots of layers.

It was really nice to use some vintage lace flowers that my Grandma handed down to me recently when she was having a crafty clean out.


The title for this layout has three different mixy matchy alpha stickers and Thickers.  


And I keep going back to these sweet and delicate birdies and birdcages made by Scrapmatts.  This cage is embossed with white embossing powder, and the little birdy has been left as bare chipboard.


This miniature banner is from the sticker sheet of Crate Paper's Random Collection.   It's ready to go with different patterned papers for each pennant, all pre-cut to the same size.


Flowers, flowers and more flowers!  There is a mix of store bought, hand cut and resin flowers here.  I just kept adding flowers until it turned into a little bouquet of sorts, and I'm really happy with how it turned out.  

Do you have a favourite type of flower?  Store bought.....hand crafted.....two dimensional so your layout can stay nice and flat?

Hope you've enjoyed this update!  I've had a surprise full time job for a few weeks now and will probably be working for another three weeks yet, so there's not been much time for crafty endeavours.  Can't wait to be back playing with pretty papers and glue!


Friday 9 August 2013

Scrapbooking Memories Challenge

A little while ago I contributed to a challenge from Scrapbooking Memories magazine to create a layout and a card using their free paper and scrapabet.


I just loved the fun colours in the papers, and the hearts, banners, flowers and tags are just the kind of elements I love to work with.

Most of the layout features the free patterned paper and elements, the only additional items being the white cardstock base, some corrugated cardboard, one patterned paper from My Mind's Eye, some lace and twine, buttons and doilies.

I also used a mask from The Crafters Workshop, and wanted quite a subtle effect for the background, so mixed up a strong batch of tea and used a small spray bottle to mist it.  Love budget ideas!


The  paper and scrapabet were designed by Studio Flergs who are a digital scrapbooking studio.  You can find Studio Flergs over here, and remember that even if, like me, you're not a digital scrapper, you can print digital elements onto paper or cardstock and cut them out to use in a traditional layout.


The Studio Flergs lined patterned paper had a pretty whitewash effect around the edges which I wanted to carry through onto my card.  Once the paper was cut down to size though the whitewash effect was only on two of my four sides.

I found some acrylic paint in a matching colour in my stash, and dry brushed the edges (using just a little over the two sides that already had the whitewashed effect, just to blend them all together).


I layered two hearts and used some brackets as part of my sentiment, just for something a bit different.  Do you like to use words for your card sentiments or do you sometimes add in shapes or punctuation to mix things up a bit?

Thanks for stopping by today!


Friday 26 July 2013

A Photo Collage Layout

Happy Friday Folks!

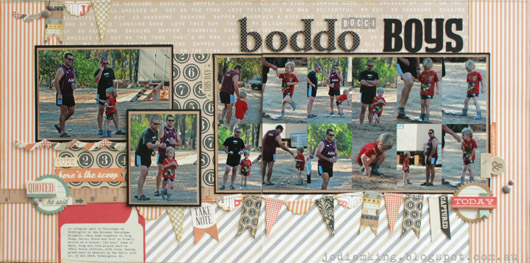
Do you ever find yourself wanting to use a bunch of photos from one photo shoot on a layout, but can't seem to narrow your photo choices enough?  I had that issue while choosing the photos for this double page layout.  In the end I decided to create a photo collage in Photoshop Elements, and to include two other larger photos to balance the layout.


Each of the smaller images in the collage are 2" by 3", making the entire collage 12" by 6". 

I have used Teresa Collins He Said She Said - He Said collection here.  This line is perfect for a masculine layout, and the pops of red really complimented these photos of my nephew in his Ben 10 shirt.


The left hand page.  You will notice here that the two photos from the very left of the photo collage are actually on the left page, but when you view the layout as a whole this is barely noticeable.


The right page.  The title was a combination of Thickers (did you notice I used upside-down "p's" for my "d's" in "boddo"? - I had already used up all my "d's"!), sticker alphas from the collection's sticker sheet, and "boys" was cut using my Silhouette Cameo.  


Some close ups of some of the layering.  I loved all the little phrases in this line.  And I don't think I can create anything at the moment without including some of those cute enamel dots!


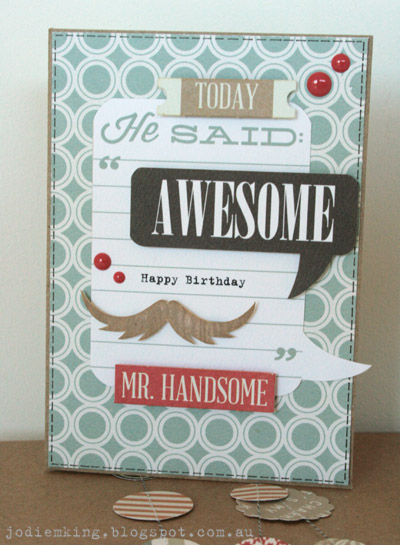
I always make at least one card with leftovers from a layout.  The "He Said" journal tag was cut from the Quotes paper and then run through my printer for the sentiment, and I then added some die cut and fussy cut phrases, and some more enamel dots.


The moustashe was also fussy cut from patterned paper.


I find that fussy cutting patterned paper gives me so many additional elements to use on layouts and cards.   Are you a fussy cutter or do you find it hard to cut into those pretty patterned papers?